Tuesday, January 30, 2018

09 - ASP.NET Core Command-line Interface

.NET Core Command-line Interface

The .NET Core command-line interface (CLI) is a new cross-platform tool for creating, restoring packages, building, running and publishing .NET applications.
We can verify whether the CLI is installed properly by opening command prompt in Windows and writing dotnet and pressing Enter. If it displays usage and help as shown below then it means it is installed properly.

.NET Core Command-line Interface

Command Structure:

The following is a command structure.
dotnet <command> <argument> <option>

Create a New Project:

To create a new .NET Core project, we have to use new command followed by template name argument. 
dotnet new console
The following creates new console project in the current directory with the same name as current directory.
dotnet new console
The following command creates a new console project named MyConsoleApp. The -n or --name option species the name of a project.
dotnet new console -n MyConsoleApp
The following command creates a new console application named MyConsoleApp to MyProjects directory. The -o or --output option is used to specify an output directory where the project should be generated.
dotnet new console -n MyConsoleApp -o C:\MyProjects
After creating a project, navigate to the project directories in command prompt to apply project specific commands which is C:\MyConsoleApp in our case.

Add Package Reference:

We often need to add NuGet package reference for different purposes. For example, apply the following command to add Newtonsoft.json package to our console project.
C:\MyConsoleApp>dotnet add package Newtonsoft.json
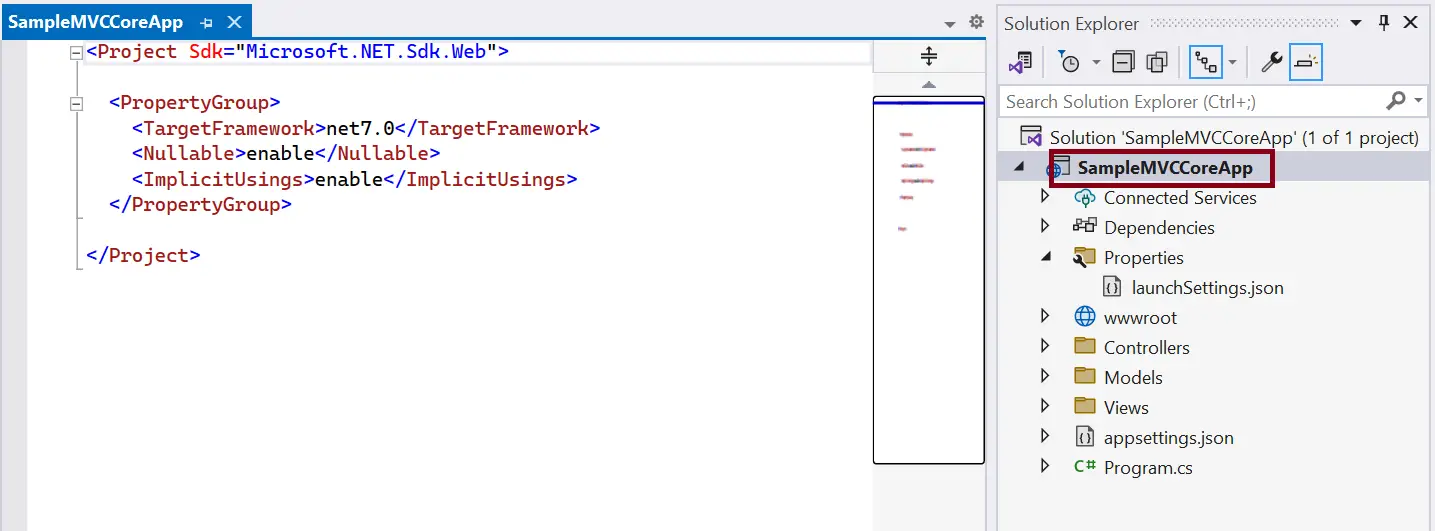
This will add Newtonsoft.json package to our project. We can verify it by opening .csproj file.

Restore Packages:

To restore packages or to update existing packages, we can use restore command as below.
C:\MyConsoleApp>dotnet restore

Build Project:

To build a new or existing project, apply C:\MyConsoleApp>dotnet build command.

Run project:

To run our console project, apply 
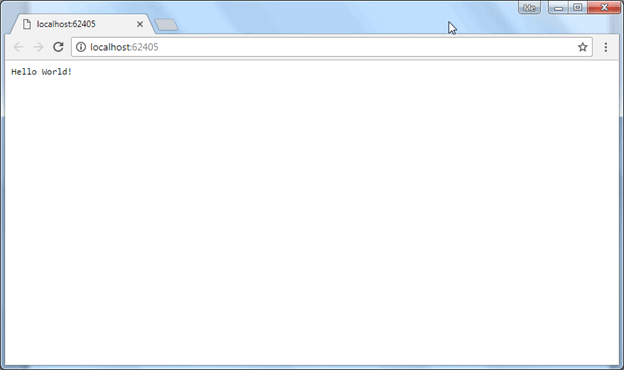
dotnet run command as shown below.


As you can see above, it displays an output "Hello World!".

Getting Help:

We can get help on any .NET Core CLI commands by typing -h or -help at the end of the command we want to get help on.


08 - ASP.NET Core - Startup.cs

ASP.NET Core - Startup Class

ASP.NET Core application must include Startup class. It is like Global.asax in the traditional .NET application. As the name suggests, it is executed first when the application starts.

The startup class can be configured using UseStartup<T>() method at the time of configuring the host in the Main() method of Program class as shown below.


public class Program
{
    public static void Main(string[] args)
    {
        BuildWebHost(args).Run();
    }

    public static IWebHost BuildWebHost(string[] args)
    {
        WebHost.CreateDefaultBuilder(args)
            .UseStartup<Startup>()
            .Build();
    }
}

Open Startup class in Visual Studio by clicking on the Startup.cs in the solution explorer. The following is a default Startup class in ASP.NET Core 2.x.


 Startup class includes two public methods: ConfigureServices and Configure.

ConfigureServices():

The Dependency Injection pattern is used heavely in ASP.NET Core architecture. It includes built-in IoC container to provide dependent objects using constructors.
The ConfigureServices method is a place where you can register your dependent classes with the built-in IoC container. After registering dependent class, it can be used anywhere in the application. 

Configure():

The Configure method is a place where you can configure application request pipeline for your application using IApplicationBuilder instance that is provided by the built-in IoC container.
The following is a default Configure method.
public void Configure(IApplicationBuilder app, IHostingEnvironment env)
{
    if (env.IsDevelopment())
    {
        app.UseDeveloperExceptionPage();
    }

    app.Run(async (context) =>
    {
        await context.Response.WriteAsync("Hello World!");
    });
}

At run time, the ConfigureServices method is called before the Configure method. 

Monday, January 29, 2018

07 - ASP.NET Core - Program.cs

ASP.NET Core - Program.cs

ASP.NET Core web application is actually a console project which starts executing from the entry point public static void Main() in Program class where we can create a host for the web application.

Setup Host in ASP.NET Core 1.x:

The following is a typical Program.cs in ASP.NET Core 1.x.
Program.cs

using System;
using System.Collections.Generic;
using System.IO;
using System.Linq;
using System.Threading.Tasks;
using Microsoft.AspNetCore.Hosting;

namespace MyFirstCoreApp
{
    public class Program
    {
        public static void Main(string[] args)
        {
            var host = new WebHostBuilder()
                .UseKestrel()
                .UseContentRoot(Directory.GetCurrentDirectory())
                .UseIISIntegration()
                .UseStartup<Startup>()
                .Build();

            host.Run();
        }
    }
}

The WebHostBuilder class is the helper class to create and configure a host for a web application. 

The UseKestrel() method is an extension method which specifies Kestrel as an internal web server. The Kestrel is an open-source, cross-platform web server for ASP.NET Core. It is designed to be used behind proxy because it has not yet matured to be exposed as a full-fledge web server.

ASP.NET Core application can be a cross-platform application so it can be used with any web server, and not only IIS.
The UseContentRoot() method specifies the current directory as a root directory which will be srcfolder in the default ASP.NET Core project. 


The UseIISIntegration() method specifies the IIS as the external web server or the reverse proxy server.

The UseStartup<startup>() method specifies the Startup class to be used by the web host. Visual Studio creates Startup.cs by default with every new ASP.NET Core application. This Startup class is like Global.asax of .NET framework where you can configure request pipeline (middleware). 

The Build() method returns an instance of IWebHost using the configuration specified above.

The Run() method starts the web application and blocks the calling thread till the host is shutdown. 

Setup Host in ASP.NET Core 2.x:

The following is the Program class in ASP.NET Core 2.x:
Program.cs

using System;
using System.Collections.Generic;
using System.IO;
using System.Linq;
using System.Threading.Tasks;
using Microsoft.AspNetCore.Hosting;

namespace MyFirstCoreApp
{
    public class Program
    {
        public static void Main(string[] args)
        {
            BuildWebHost(args).Run();
        }

        public static IWebHost BuildWebHost(string[] args) =>
            WebHost.CreateDefaultBuilder(args)
                .UseStartup<Startup>()
                .Build();
    }
}

The method expression BuildWebHost() build web host with pre-configured defaults  and it can be written as a method that returns IWebHost.

The CreateDefaultBuilder() method creates a new instance of WebHostBuilder with pre-configured defaults also creates an instance of WebHostBuilder and sets up Kestrel, content root directory, IIS integration which is same as ASP.NET Core 1.x Main()method.
It also calls ConfigureAppConfiguration() to load configurations from appsettings.json files, environment variables and user secrets. The ConfigureLogging() method setup logging to console and debug window.

CreateDefaultBuilder()

public static IWebHostBuilder CreateDefaultBuilder(string[] args)
{
    var builder = new WebHostBuilder()
        .UseKestrel()
        .UseContentRoot(Directory.GetCurrentDirectory())
        .ConfigureAppConfiguration((hostingContext, config) =>
        {
            var env = hostingContext.HostingEnvironment;

            config.AddJsonFile("appsettings.json", optional: true, reloadOnChange: true)
                    .AddJsonFile($"appsettings.{env.EnvironmentName}.json", optional: true, reloadOnChange: true);

            if (env.IsDevelopment())
            {
                var appAssembly = Assembly.Load(new AssemblyName(env.ApplicationName));
                if (appAssembly != null)
                {
                    config.AddUserSecrets(appAssembly, optional: true);
                }
            }

            config.AddEnvironmentVariables();

            if (args != null)
            {
                config.AddCommandLine(args);
            }
        })
        .ConfigureLogging((hostingContext, logging) =>
        {
            logging.AddConfiguration(hostingContext.Configuration.GetSection("Logging"));
            logging.AddConsole();
            logging.AddDebug();
        })
        .UseIISIntegration()
        .UseDefaultServiceProvider((context, options) =>
        {
            options.ValidateScopes = context.HostingEnvironment.IsDevelopment();
        });

    return builder;
}


Saturday, January 13, 2018

06 - ASP.NET Core - wwwroot

ASP.NET Core - wwwroot

By default, the wwwroot folder in the ASP.NET Core project is treated as a web root folder. Static files can be stored in any folder under the web root and accessed with a relative path to that root.
In the standard ASP.NET application, static files can be served from the root folder of an application or any other folder under it. This has been changed in ASP.NET Core. Now, only those files that are in the web root - wwwroot folder can be served over an http request. All other files are blocked and cannot be served by default.
Generally, there should be separate folders for the different types of static files such as JavaScript, CSS, Images, library scripts etc. in the wwwroot folder as shown below.
wwwroot
You can access static files with base URL and file name. For example, we can access above site.css file in the css folder by http://localhost:<port>/css/app.css.
You need to include a middleware for serving static files in the Configure method of Startup.cs. 

05 - ASP.NET Core Project Structure

ASP.NET Core Project Structure

Here, you will learn about the project structure and importance of each file created by ASP.NET Core application template in Visual Studio 2017.
The following is a default project structure when you create an empty ASP.NET Core application in Visual Studio.


ASP.NET Core Project Structure

The above solution explorer displays project solution. We can change it to folder view by clicking Solution and Folders icon and selecting Folder View option. This displays the solution explorer with all project folders and files as shown below.


Solution Explorer - Folder View


ASP.NET Core project files and folders are synchronized with physical files and folders. If you add a new file or folder in project folder then it will directly reflect in the solution explorer. You don't need to add it in the project explicitly by right clicking on the project.

.csproj:

ASP.NET Core 1.0 does not create .csproj file, instead, it uses .xproj and project.json files to manage the project. This has changed in ASP.NET Core 2.0. Visual Studio now uses .csproj file to manage projects. We can edit the .csproj settings by right clicking on the project and selecting Edit <project-name>.csproj as shown below.


Edit .csproj

The .csproj for the above project looks like below.


Edit .csproj

The csproj file includes settings related to targeted .NET Frameworks, project folders, NuGet package references etc.

Dependencies:

The Dependencies in the ASP.NET Core 2.0 project contain all the installed server-side NuGet packages as well as client-side frameworks such as jQuery, AngularJS, Bootstrap etc. These client-side dependencies are managed using Bower in Visual Studio.


Dependencies

As you can see above, dependencies node in solution explorer displays installed NuGet packages. This also includes bower folder which has all the client-side frameworks library installed it using Bower.

Properties:

The Properties node includes launchSettings.json file which includes Visual Studio profiles of debug settings. The following is a default launchSettings.json file.


launchSettings.json

We can also edit settings from the debug tab of project properties. Right click on the project -> select Properties -> click Debug tab.


Project Properties

In the debug tab, select a profile which you want to edit as shown above. You may change environment variables, url etc.

04 - ASP.NET Core First Application

First ASP.NET Core Application

Here, we will learn how to create our first .NET core 2.0 application. We will use Visual Studio 2017 to create ASP.NET Core 2.0 web application.
The first step is to open Visual Studio. Click on File->New, and click on Projects.
In the New Project dialog box, click on the Templates node. Expand the Templates node, then expand Visual C#, and click on the Web template.


ASP.NET Project Templates

As shown above, the middle pane on the New Project dialog box includes the following two templates for ASP.NET Web projects:
  • ASP.NET Core Web Application - Select this template to create a new crossplatform compatible ASP.NET Core web application project that runs on the .NET Core framework.
  • ASP.NET Web Application (.NET Framework) - Select this template to create a new ASP.NET web application project that runs on standard .NET Framework.
Here, we want to create a cross-platform ASP.NET Core web application. So, select ASP.NET Core Web Application template. Give the appropriate name, location, and the solution name for the ASP.NET Core application. In this example, we will give the name MyFirstCoreApp, and click on the OK button. This will open another popup as shown below.


ASP.NET Core Templates

As you can see, we can select the version of the framework we want to use in our application. We are going to use .NET Core 2.0 framework here. So select ASP.NET Core 2.0 in the dropdown as shown below.


ASP.NET Core Version

Now, select an Empty ASP.NET Core template in order to understand the basics of ASP.NET core web application. We will not use Docker support or authentication here, so click on OK to create an ASP.NET core web application as shown below.


ASP.NET Core Web Project in Visual Studio

Wait for some time till Visual Studio restores the packages in the project. Restoring process means Visual Studio will automatically add, update or delete configured dependencies as NuGet packages in the project. The entire project structure of the created project will look like below.


ASP.NET Core Project Structure

We will understand the project structure in the next chapter. To run this web application, go to Debug menu and click on Start without Debugging, or press Ctrl + F5. This will open the browser and display the following result.


The above output "Hello World!" comes from the Configure method of Startup class in the Startup.cs file in the project. Open Startup.cs file and see Configure method. Change "Hello World!" string to something else and it will change the output accordingly. 
You can also see the IIS express icon on the system tray. Right click on it. You can see the ASP.NET sites currently running in your development machine.


ASP.NET Core app in System tray

This is how we can create a new cross-platform ASP.NET core application that runs on .NET Core.